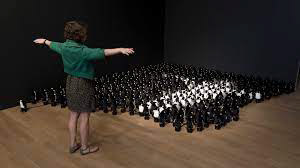
Do you ever feel like you're being watched?
This sensation is called Scopaesthesia. In our digital world, everything we do is monitored or tracked in some capacity, but most of us don’t give it a second thought. Is that because it actually doesn't matter, or just because we can’t see the surveillance happening?
This installation aims to replicate this feeling in order to confront the user with the state of surveillance capitalism, and make them question how they value their personal privacy.
Team Members: Sam Lippincott (myself), Miles Lewis, Logan Turner
Team Roles: Algorithmic Design, Mechanical Design and Fabrication, Organization and Concept Development
Timeline: October 2022 - April 2023
Scripting Languages: Python, Arduino, Processing
CONCEPT
PRECEDENCE
Much of our inspiration came from the physical installations of Daniel Rozin. As you move, the installation moves with you, reflecting your motion. We found this idea to be very compelling.
While Rozin's installations reflect the user, they act more as an analogy for mirrors in a novel, fun way. But what would it feel like if that reflection is staring back at you?
We sought to apply this idea of interactive, reflective installations to invoke a feeling of horror or discomfort rather than entertainment.


SURVEILLANCE
But this sensation of horror has other applications. In an ever increasingly digital world, surveillance has exponentially increased.
Amnesty International uncovered a trend where the 25,000 surveillance cameras in NYC were used in racial profiling through facial recognition software in predominantly minority boroughs.
By incorporating computer vision into animatronic eyes in an interactive installation, we hope to merge the effects of scopaesthesia induced by human eyes with an awareness of digital surveillance that leaves users asking themselves if they should really be ok with being constantly surveilled.
PROCESS
Our first proof of concept was a simplified, purely digital prototype using Processing 4.
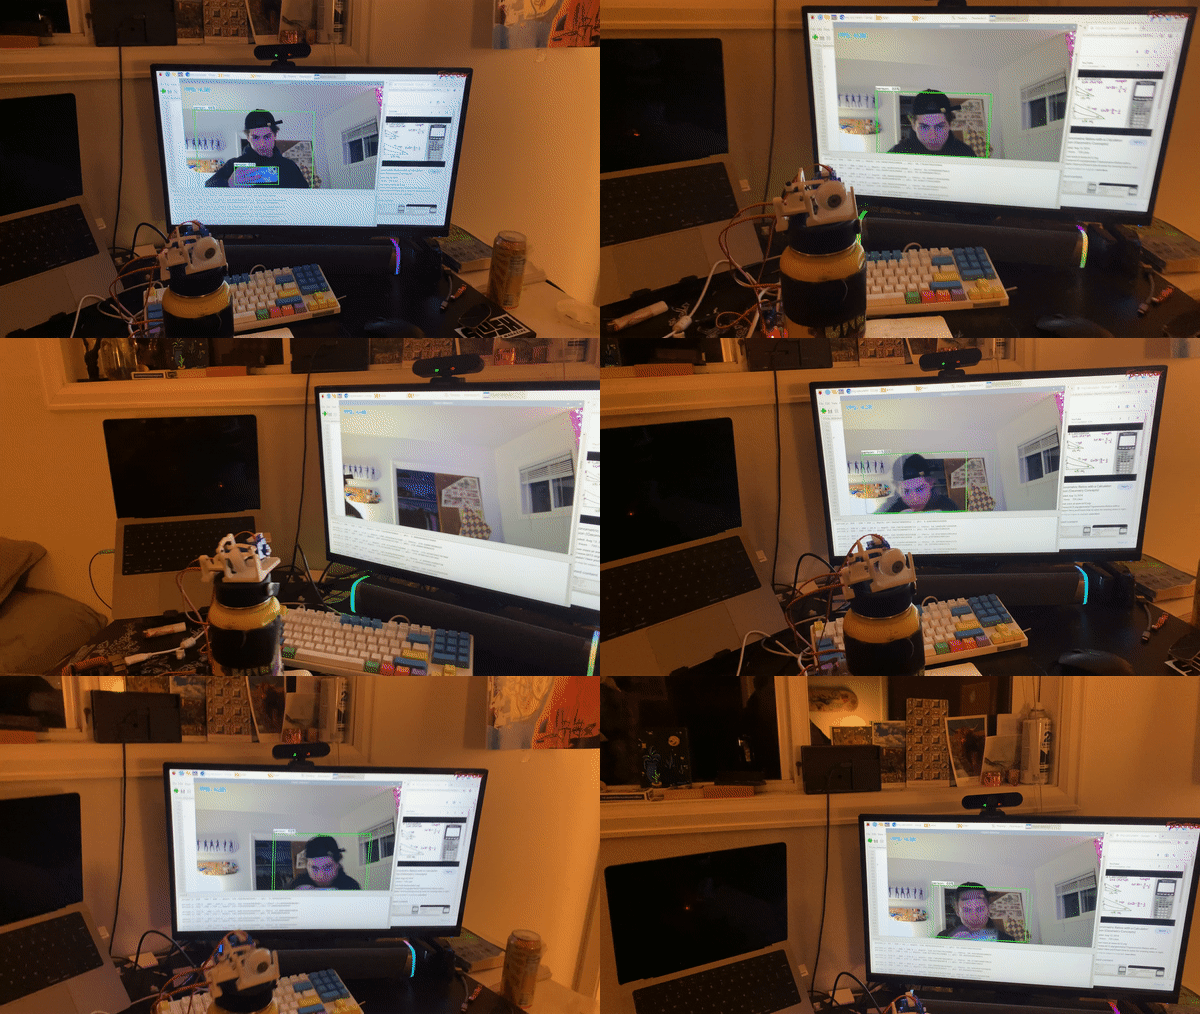
Instead of having mechanical eyes, I used circle objects to represent the eyes, and rotated them towards the user in the cameras view field. To apply a sense of depth tracking, I programmed the iris circle objects to move away from the center of the sclera object (the whites of the eyes) as the user got closer to the camera. This shows parallax as the eyes move more when an object is moving closer to the eyes vs farther away.
The next step was to take the eyes into the physical space. Miles built the mechanism for the eyes, I just had to program the movement.
This was simply a matter of writing a script in Processing 4 which utilizes OpenCV for computer vision, and feeds the angles for the lateral and vertical movement to the eye. Here I ran into an issue with Arduino where you could only send one value to the port. Because I was trying to send at least two values, I had to get creative. My solution was to put the angle values into a string variable, separated by a specific character. This is actually how .csv files work, as each individual value is separated by a comma. In this case I used a space.
Then, once received by Arduino, I would parse out the string into the separate values and feed them into the servos.
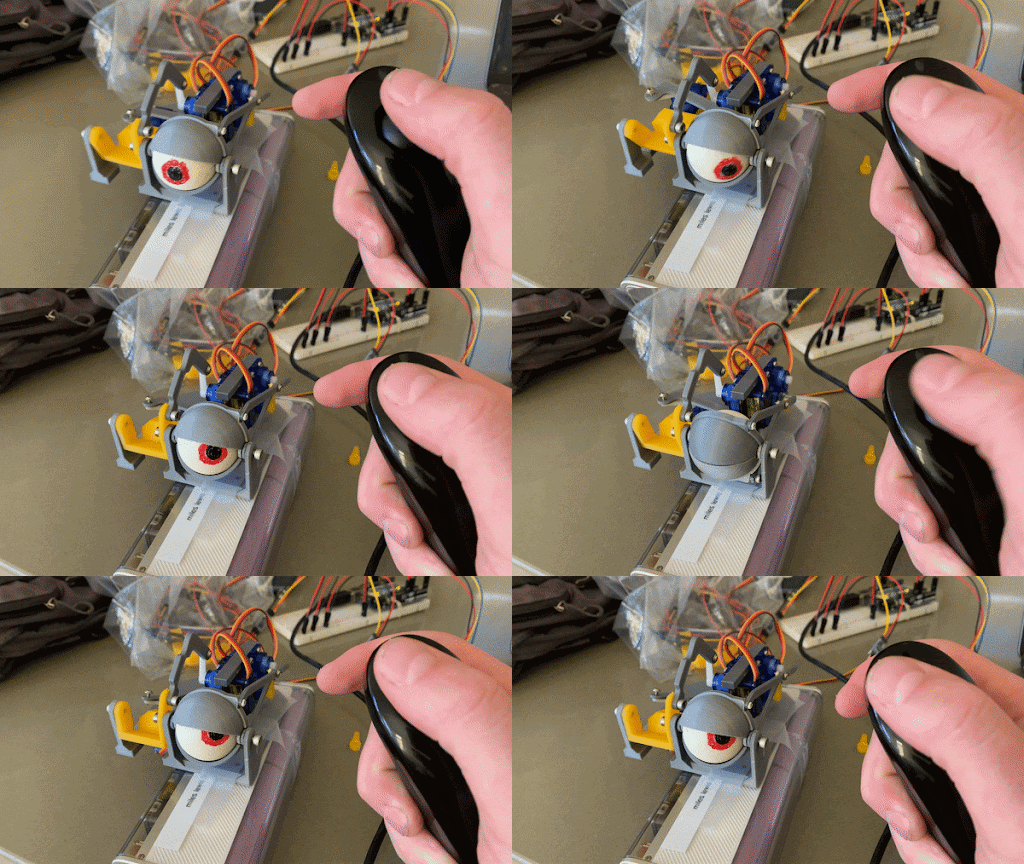
Below you can see the mechanism being controlled by a nunchuk, and then by the algorithm. At this point the algorithm was still a bit buggy as I hadn't set up the rotation limits.


One eye is cool but we wanted more.
We decided we would be making a grid of 64 eyes and realized that staying with Arduino would require a computer to always be present with the installation to run the code. As we hope this installation can stand on it's own without us needing to be present, it quickly became clear we would need to switch to Raspberry Pi. Raspberry Pi is essentially a tiny computer that code can be uploaded to and ran on.
The problem was that I had written both past scripts in Processing. I would need to rewrite the code in Python with a Python compatible computer vision, Tensor Flow Lite.
This was simple in concept as I had already written the logic, but it would be complicated in practice as I didn't have a monitor at my disposal so to code at home, I would have to code without being able to test for errors.
To debug the code Miles and I would meet up to squash bugs in one go. This was a nice solution to my blind-coding issue, though coding was still not easy.
Finally, hours of bug testing later, the logic was done.
HOW IT WORKS
Here I'll discuss how each feature of the code works. Math discussion ahead!
TRACKING
The eye tracking truly boils down to trigonometry.
Since we're dealing with only the information provided in the two dimensional camera feed, I needed to map distances as projections in the 2D space. Because the origin point of shapes in Python are placed in the upper left corner, I chose to shift this origin to the center of the screen for ease of calculation and object placement.
Each eye is placed at it's approximate position the sight of the camera, creating a grid of them on the screen. I then calculate the distance on each axis from each approximate eye position to the position of the person captured with computer vision (using OpenCV for the prototype and Tensor Flow for the final build).
The arctangent is then taken of this distance value divided by an estimated depth of the person from the camera. The depth is calculated fairly arbitrarily, multiplying a constant value by the width of the detected user. The depth multiplying constant is purely estimated. Miles and I tested various values until we found one that felt reasonable.
This calculation is done for both horizontal and vertical angle axes.
USER PRIORITIZATION
We played around with several options for the case where there are multiple people being detected by the camera.
The first idea was to have each eye track the closest user to it, but we found this wasn't as effective or interesting to watch as our second idea.
Our second idea was to simply have all the eyes track the user that is closest to the camera. This is done by selecting the detection with the largest detection box width. This also means that you can draw it's attention by increasing the size of your detection box, which is can be done by waving your arms around.
BLINK
The last feature of note is that the eyes will blink randomly. The actual blink motion is driven by a servo operating two lever arms connected to the eyelids.
Initially, we had the code that runs the opening and closing motion of the eyelids within the loop containing the eye position update. But, we found that having this loop nested within the main looped slowed down the operation as the blink had to finish before the next eye would be updated.
Our solution was to have the eyelid opening-closing movement run in parallel with the eye updates so that one eye could blink while the other eyes moved. This is done by incrementing the angle on the servo that operates the blink once per eye movement step. Once the blink reaches a maximum closed value, the eyelids reset and a new eye is randomly selected.
BOTTLENECKED
As the size of the entire eye angular position update loop is ultimately the bottleneck for how fast the eyes can update, if you have too many eyes, the sequential update will become noticeable. I tried to think of a workaround where each eye or even each row of eyes would be updated simultaneously, but the only solution I could think of was using multiple Raspberry Pis and run multiple instances of the program across all the Raspberry Pis. As a single Raspberry Pi costs approximately $150, this wasn't within our budget for this project. If this concept is pursued professionally in the future, this could be a great option.
Obviously, there is also a bottleneck when it comes to powering the servos. Our power supply is a 6A, 5V battery and could run our 192 servos as well as the Coral accelerator, but a larger power supply would likely be needed with more servos added.
THE VIDEO
As my primary route of interest for this project was the horror angle, I produced our promotional video.
The video was limited to a 60-90 seconds, so I wanted to make something simple. I started by storyboarding my idea.
As the shock value of our project is significant I wanted that to be incorporated into the video, so I wanted to start it off with intrigue at what is on screen, and turn that immediately into discomfort. This fluidly led to a title screen. To explain the project I wanted to use a voiceover. As the idea developed I thought it would add to the technology angle if the voice was recorded using a text-to-speech reader. It's also important for the video to demonstrate the installation in action, thus I placed the voiceover over a timelapse montage of users interacting with the piece.
I used Adobe Premiere Pro to edit the video, which was a bit of a learning curve as I've only used other editing software.
The finished video can be found at the top of the page.
THE TEAM
If you'd like to learn about the fabrication process or what it was like to manage the project, visit my team members' project blogs below! Both were a pleasure to work with.
Miles Lewis : Fabrication - Logan Turner : Project Management